

Embroidering a baseball cap is a fun way to personalize your style, create unique gifts, or promote your brand. Whether you're a beginner or have some experience with embroidery, this guide will walk you through the essential steps for creating professional-looking embroidered baseball caps. From selecting the right materials to troubleshooting common mistakes, here's everything you need to know to get started!
Introduction to Embroidering a Baseball Cap
Embroidery on baseball caps has become a popular way to express personal style, promote businesses, or create custom gifts. Whether you're adding your name, a logo, or a fun design, embroidery provides an easy way to enhance the cap's appearance and make it unique. Custom embroidered caps are used for sports teams, fashion, branding, and even personal expression. This guide will help you learn how to embroider a baseball cap step by step, from choosing the right materials to finishing the design. With some practice and patience, you'll be able to create professional-quality embroidered caps at home!

Tools and Materials You Need for Embroidering a Baseball Cap
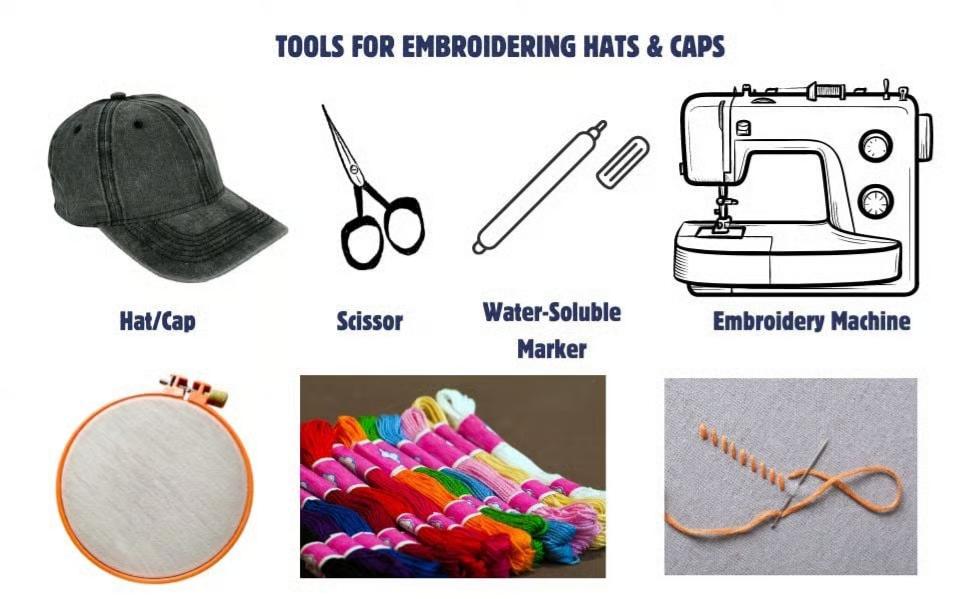
Before you start, it's essential to gather all the tools and materials needed for your embroidery project. Here's a list of the essentials:
Embroidery Machine
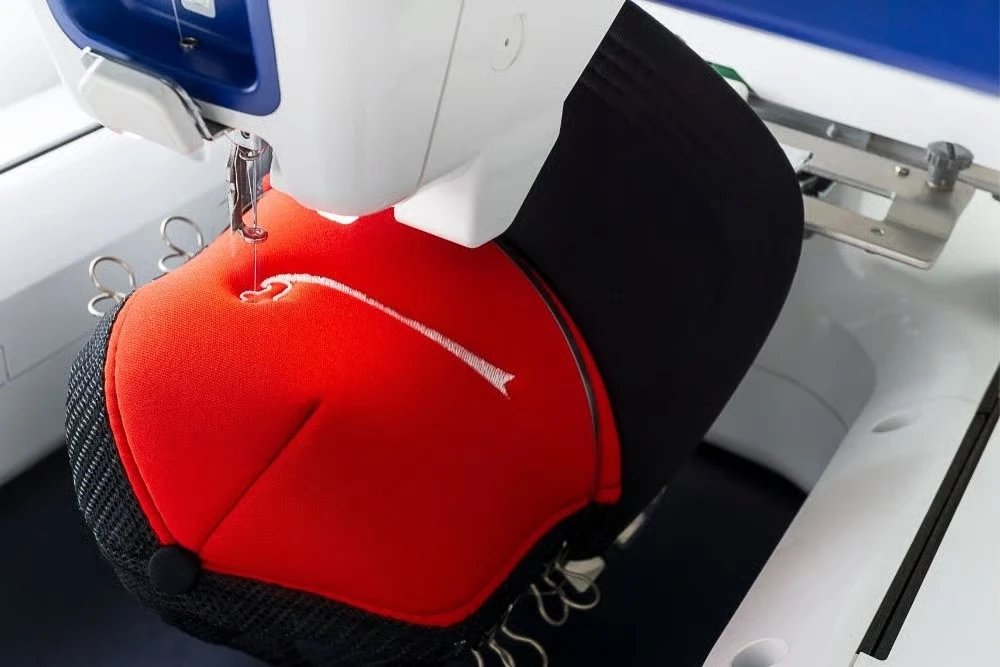
If you're machine embroidering, you'll need a reliable embroidery machine. Ensure it's set up for cap embroidery, especially one that includes a cap frame to hold the curved surface securely.
Embroidery Thread
Choose thread that suits the fabric of the cap. Polyester is a great choice due to its durability and smooth finish. It's also resistant to fading, which is important for items that will be worn outdoors.
Needles and Hoop
For hand embroidery, select a needle suited for embroidery (ballpoint or embroidery needle). When using a hoop, ensure it is the right size to maintain fabric tension. A larger hoop can make hand stitching easier on certain cap styles.
Cap
Choose a cap made from fabric that supports embroidery, like cotton or polyester. For the best results, avoid hats made from stretchable or very thin fabric unless you use a stabilizer.
Stabilizer
A stabilizer prevents the fabric from puckering and shifting during the embroidery process. Tear-away stabilizers are common for most caps, while cut-away stabilizers work best for thicker fabrics.
Heat Transfer Paper or Templates
These are used to transfer your design onto the cap. Templates can be particularly helpful for ensuring accurate placement and symmetry.
Other Tools
Scissors, a ruler for measuring, pins, and clips will come in handy during the process. Also, having fabric chalk or a disappearing ink pen will make design placement easier.
Choosing the Right Baseball Cap for Embroidery
Selecting the right cap is key to successful embroidery. Here's what to consider:
Material
Look for caps made of cotton, polyester, or denim. These fabrics hold embroidery well, ensuring that your stitches stay in place and don't get lost in the fabric. Avoid stretchy or delicate materials unless you use a stabilizer to keep the fabric stable during stitching.
Cap Shape
Different styles of caps, such as structured (fitted caps) and unstructured (soft caps), require different approaches. Structured caps are easier to embroider because the fabric is more stable. Unstructured hats may require a stabilizer to keep the fabric from shifting during the embroidery process.
Brim Type
The shape of the brim can affect the design placement. Flat-brimmed caps allow for larger designs and may be more flexible with positioning, while curved-brimmed caps can be more challenging, as the design needs to fit the curve of the brim without distortion.
Designing Your Embroidery Pattern
The design is the heart of your project. Here's how to create one that fits your cap:
Simple Fonts and Graphics
Opt for simple, bold fonts and large shapes. Intricate designs may not show well on a small, curved cap, and might lead to distorted stitching. Bold, graphic elements tend to be clearer and more readable, especially on hats with limited stitching space.
Software Tools
Programs like Adobe Illustrator or free online tools can help you create clean designs, allowing you to size them correctly for the hat. Alternatively, you can use pre-made templates that suit your cap style.
Design Size and Placement
Ensure your design fits within the available space, especially on the front of the cap. The area may be limited, so adjust the size to make sure the design is readable and visually appealing. Also, consider the curvature of the hat when placing the design. Test on scrap fabric to determine where the design fits best.
Preparing the Baseball Cap for Embroidery
Proper preparation is crucial for achieving neat and consistent embroidery.
Flatness
Ensure the cap is flat and wrinkle-free. If the cap is curved, make sure it's positioned properly in the hoop or frame to avoid misalignment. Smooth out any folds or creases to prevent them from showing in your design.
Mark the Design Placement
Use fabric chalk or a disappearing ink pen to mark where the design will go. This ensures you don't have to guess during stitching and helps with precise placement.
Fix the Cap
If you're using a machine, ensure the cap is properly secured in the embroidery hoop or cap frame. For hand embroidery, using a hoop can help maintain fabric tension and stability, preventing the fabric from shifting during stitching.
Setting Up the Embroidery Machine or Hand Embroidery Setup
Once your cap is ready, setting up the embroidery process is the next step:
Embroidery Machine Setup
Select the appropriate needle and thread for the cap material. Ensure the embroidery machine is threaded correctly, and set the proper stitch tension for the fabric you're using. Adjust the design's size and placement to fit your cap's dimensions.
Hand Embroidery Setup
Choose your thread and needle based on the design complexity. If using a hoop, ensure the fabric is taut and secure to avoid distortion during stitching. For a smoother stitching process, make sure the needle size corresponds with the thickness of the fabric and thread you're using.
Embroidering the Baseball Cap
Now it's time to start stitching! Here's how:
Machine Embroidery
Once everything is set up, start the machine and monitor the stitching process. Ensure the thread is flowing smoothly, the design is stitching properly, and the cap stays securely in place. Keep an eye out for any misalignments or issues with the fabric.
Hand Embroidery
Start stitching from the center of your design and work your way out. Use even, controlled stitches for a neat finish. If you're using a backstitch or satin stitch, maintain a consistent stitch length. Hand embroidery allows for more detailed work but requires patience and focus.
Finishing Touches and Clean-Up
After the embroidery is finished, it's time to clean up and finalize the cap:
Trim Excess Threads
Carefully cut away any loose threads with embroidery scissors to ensure the design looks clean and professional. Avoid pulling threads too tightly to maintain the integrity of the stitching.
Inspect the Embroidery
Check for any missed stitches or areas that need touching up. If necessary, do some fine-tuning on the machine or by hand to perfect the design.
Steam the Cap
Gently steam the cap to remove wrinkles and restore its shape. Be careful not to press directly on the embroidery. A little steam can refresh the fabric and remove any creases from the embroidery process.
Clean the Hat
If necessary, clean the cap according to fabric care instructions. Dry it naturally to maintain its shape and avoid any shrinkage that may distort the embroidery.
Tips for Personalizing Your Baseball Cap
Personalization is what makes your baseball cap truly unique. Here are some ideas to inspire you:
Names and Slogans
Add your name, initials, or a fun slogan to the front of the cap. This makes the cap personal and unique while keeping it clean and legible.
Multiple Colors
Enhance the design by incorporating a combination of contrasting thread colors. This will help the design stand out and create a more eye-catching look.
Small Designs on the Side or Back
Consider adding small logos, symbols, or text to the side or back of the cap for a creative, subtle touch. This adds extra flair and makes the design more interesting.
Creative Inspirations
Draw inspiration from sports logos, brand logos, or even pop culture references to create a design that expresses your personality. There's no limit to the creativity you can bring to your embroidery.
Common Mistakes to Avoid When Embroidering a Baseball Cap
To ensure your embroidery looks great, here are a few mistakes to avoid:
Overly Complex Designs
Keep the design simple to avoid distortion or unclear stitching, especially on smaller areas like the front of a cap. Intricate designs often don't translate well on smaller, curved surfaces.
Improper Hat Fixation
Make sure the cap is secured properly to prevent shifting during embroidery. Use a cap frame or hoop to keep the fabric stable.
Wrong Thread Color
Choose thread colors that contrast with the hat color for a design that stands out. Avoid colors that blend too much with the fabric.
Using Inappropriate Tools or Materials
Always use high-quality needles, threads, and stabilizers to ensure the best result. Cheap materials can cause poor stitching and a lack of durability.
FAQ Section
How to Choose the Right Embroidery Thread?
Choose polyester or rayon thread for durability. Pick colors that contrast with the cap for visibility.
Does the Embroidery Design Need to Be Adjusted for Different Hat Shapes?
Yes, the design may need adjustments based on whether the cap is structured or unstructured. Curved brims may require resizing the design.
What's the Difference Between Hand Embroidery and Machine Embroidery?
Hand embroidery is slower but offers a personal touch, while machine embroidery is faster and better for more intricate or large designs.
How to Maintain the Clarity of the Embroidery Design?
Keep thread tension correct, use high-quality materials, and stabilize the fabric to avoid distortion.
Can I Embroider on Any Type of Hat?
Most hats can be embroidered, but hats with delicate or stretchy fabric may need additional stabilizers.
Conclusion
Embroidering a baseball cap is an enjoyable and creative way to add a personal touch to your wardrobe or create a unique gift. By following the steps outlined in this guide, you can achieve professional results, whether you're machine embroidering or doing it by hand. Remember, embroidery is a skill that improves with practice, so don't be discouraged if your first attempts aren't perfect. With each project, you'll get better, and soon you'll be creating custom hats with ease. So, gather your tools, choose your design, and start stitching your way to a personalized cap that reflects your style!